Most people think annealing aluminum is just “heating it up.” That’s exactly how you ruin it.
In real workshop conditions, annealing is about controlling structure, not just temperature. Once you understand what’s happening inside the metal, everything becomes predictable.
Heat evenly to approximately 300–400°C (570–750°F)
Use the soap or marker method to detect temperature
Let it cool naturally in air
This process softens the metal, reduces internal stress, and prevents cracking during forming.
What Actually Happens When You Anneal Aluminum
Let’s go one level deeper than most guides.
When you bend, roll, or form aluminum, you introduce dislocations into its crystal structure. These are defects in the atomic lattice.
More deformation → more dislocations
More dislocations → harder material
Harder material → cracks instead of bends
This is called work hardening.
So what does annealing do?
When annealing aluminum, the process allows:
Recovery → internal stress relief
Recrystallization → new grain structure forms
Grain growth → softer, more ductile material
💡 In our shop, you can literally feel this. A work-hardened piece resists bending — after annealing, it behaves like a completely different material.
Recrystallization Temperature (Why Temperature Matters)
When annealing aluminum alloys, temperature control is critical.
Typical recrystallization range:
~300°C – 400°C (570°F – 750°F)
But here’s the detail most guides skip:
Pure aluminum (1000 series) → lower temps
Alloyed aluminum (6000 series like 6061-T6) → slightly higher
👉 T6 temper alloys (like 6061-T6) lose their strength when annealed because you are reversing precipitation hardening.
Step-by-Step: How to Anneal Aluminum Properly
1. Clean the Surface
Before annealing aluminum, always remove:
oil
oxidation
dirt
Contamination causes uneven heating.
In practice, this is one of the most ignored steps — and it shows immediately in bad results.
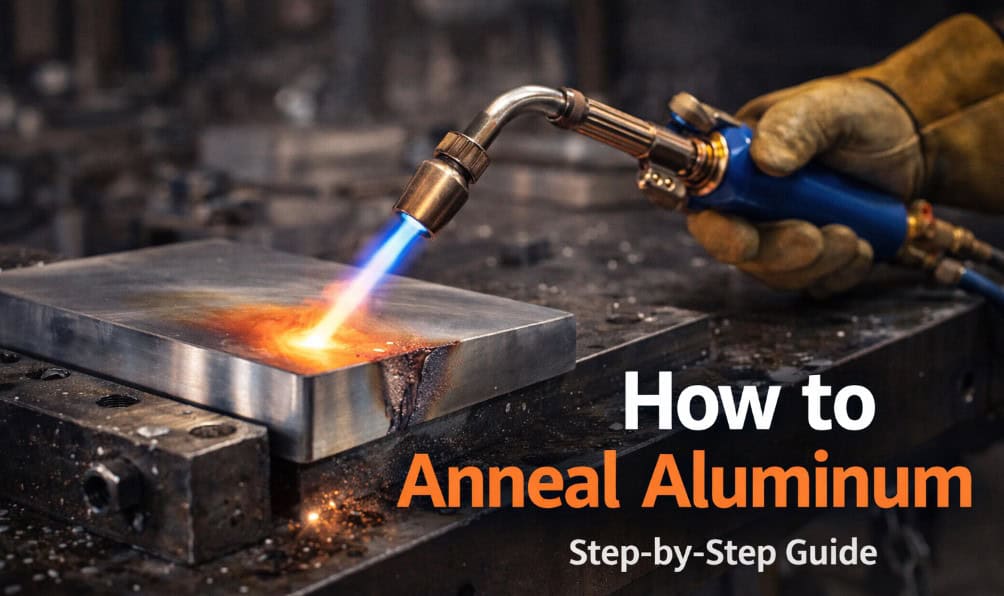
2. Apply Heat Evenly
When heating aluminum for annealing, you can use:
🔥 Oxy-acetylene torch (best control)
🔥 Propane torch (acceptable for home use)
🔥 Furnace (ideal for consistency)
Move constantly. Never stay in one spot.
3. Use the “Soap & Sharpie” Method (Critical Trick)
One of the biggest challenges when annealing aluminum at home is temperature detection.
Aluminum doesn’t glow before melting. That’s the biggest trap.
Method 1: Soap Trick
Rub plain soap on the surface
Heat the metal
When it turns black → you’re at annealing temperature
Method 2: Sharpie Marker
Draw on the surface with a marker
Heat until the mark disappears
💡 We use this method constantly in the shop. It’s simple, reliable, and removes guesswork.
4. Hold Temperature Briefly
Unlike steel, annealing aluminum does not require long soak times:
Thin parts → just a few seconds
Thick parts → slightly longer
5. Let It Cool Naturally
Air cooling is enough
No quenching required
👉 Aluminum stays soft after cooling.
Aluminum Series Comparison (Annealing Behavior)
Series
Common Alloy
Annealing Behavior
Notes
1000
Pure Aluminum
Very easy
Low temp, very soft
3000
3003
Easy
Good for forming
5000
5052
Moderate
Stronger, needs control
6000
6061-T6
More sensitive
Loses T6 strength when annealed
⚠️ Warning: Annealing 6061-T6 aluminum removes its heat-treated strength. You cannot get that strength back without full heat treatment (solution + aging).
Real Workshop Scenarios
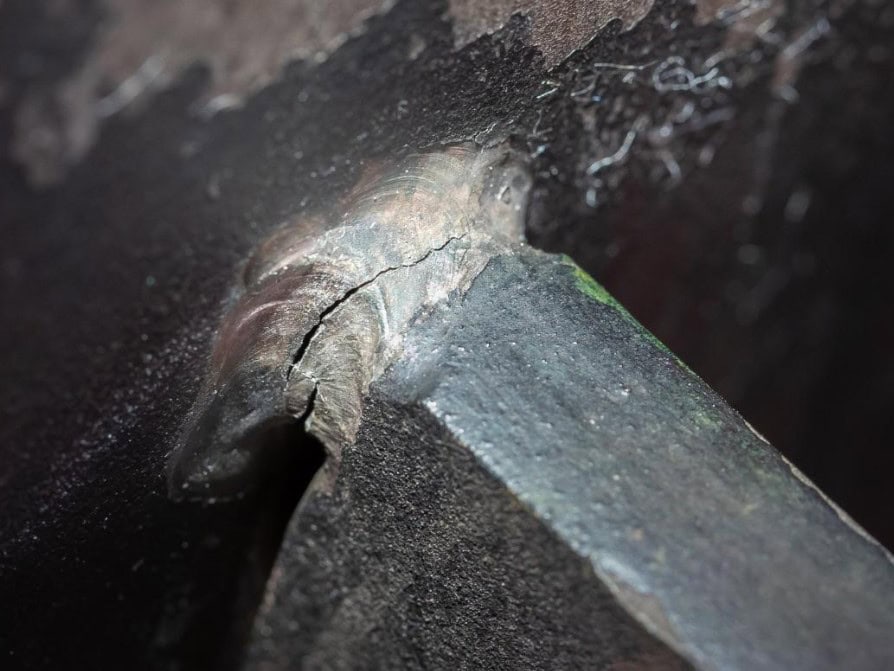
Scenario 1: Aluminum Cracks While Bending
This is one of the most common issues when forming aluminum.
Cause:
work hardened material
Fix:
anneal aluminum before forming
Scenario 2: Uneven Softness After Annealing
Cause:
uneven heat distribution
In our experience, this usually comes from rushing the torch.
Scenario 3: Sudden Melting
This is a common mistake when beginners try annealing aluminum with a torch.
Aluminum:
does NOT glow
melts suddenly
⚠️ Warning: By the time it “looks hot,” it may already be too late.
Surface & Microstructure Changes
During aluminum annealing, the following changes occur:
Grain structure → becomes larger and softer
Stress relief → reduces internal tension
Ductility → increases
But:
too much heat → excessive grain growth → weak material
Safety Protocol (Read This Carefully)
Aluminum has very high thermal conductivity.
That means:
Heat spreads FAST
Entire part gets hot — not just the flame area
⚠️ Warning: Aluminum does NOT look hot. You can grab a part that looks normal and get a serious burn instantly.
In real shop practice:
Always assume it’s hot
Use pliers, not hands
Don’t trust visual cues
Common Mistakes (From Real Experience)
Waiting for aluminum to glow ❌
Overheating thin sections ❌
Using wrong alloy assumptions ❌
Not cleaning surface ❌
Re-annealing too aggressively ❌
💡 The most common beginner mistake when annealing aluminum? Overheating. Always.
Pro Tips (From the Shop Floor)
🔧 Pro Tip: Heat slightly less than you think. You can always reheat — you can’t undo melting.
🔧 Pro Tip: Aluminum color won’t help you. Always use soap or marker.
🔧 Pro Tip: For forming work, anneal aluminum in cycles instead of trying to do everything at once.
FAQ: Annealing Aluminum
1. Does aluminum glow when heated?
No. Aluminum does not visibly glow before melting.
2. Can you anneal aluminum with a propane torch?
Yes. A propane torch works, but control is harder compared to oxy-acetylene.
3. Does annealing aluminum weaken it permanently?
For alloys like 6061-T6, yes — unless you re-heat treat (solution heat treatment + aging).
4. How do you know aluminum is annealed?
It becomes noticeably softer and easier to bend.
5. Can you anneal aluminum multiple times?
Yes, but repeated cycles can affect grain structure and reduce strength over time.
Annealing is just one part of the bigger manufacturing process. In real-world production, how a material is machined and prepared before fabrication plays a critical role in final results.
For example, properly annealed aluminum is easier to machine and produces more consistent outcomes during precision processes. At the same time, poor preparation can lead to welding issues such as excessive spatter and weak joints.
Final Thoughts
Annealing aluminum isn’t about heat — it’s about control.
Once you understand:
how dislocations form
how recrystallization works
how heat behaves in aluminum
…you stop guessing and start getting consistent results.
And in machining or fabrication, consistency is everything.
To provide the best experiences, we use technologies like cookies to store and/or access device information. Consenting to these technologies will allow us to process data such as browsing behavior or unique IDs on this site. Not consenting or withdrawing consent, may adversely affect certain features and functions.
Functional
Always active
The technical storage or access is strictly necessary for the legitimate purpose of enabling the use of a specific service explicitly requested by the subscriber or user, or for the sole purpose of carrying out the transmission of a communication over an electronic communications network.
Preferences
The technical storage or access is necessary for the legitimate purpose of storing preferences that are not requested by the subscriber or user.
Statistics
The technical storage or access that is used exclusively for statistical purposes.The technical storage or access that is used exclusively for anonymous statistical purposes. Without a subpoena, voluntary compliance on the part of your Internet Service Provider, or additional records from a third party, information stored or retrieved for this purpose alone cannot usually be used to identify you.
Marketing
The technical storage or access is required to create user profiles to send advertising, or to track the user on a website or across several websites for similar marketing purposes.